Make a rhinestone heart phone case
A single pink heart is a manageable first design: one color, one stone size, and 28 placement points.
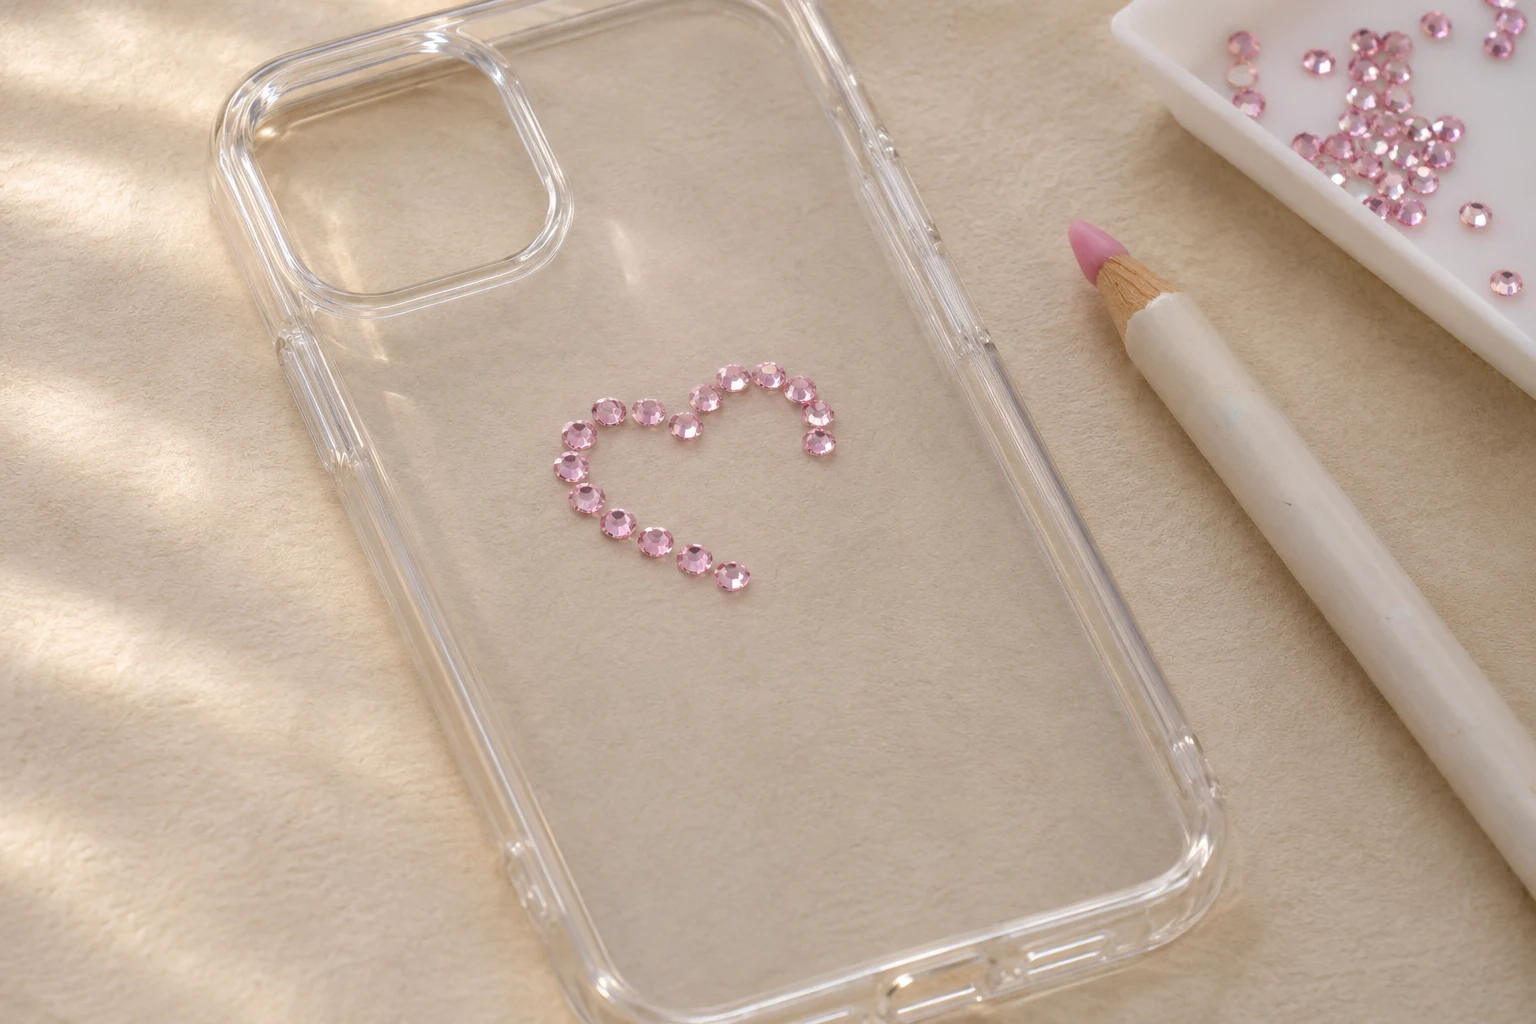
Your stone list
Set aside 28 non-hotfix 3 mm flatbacks in one color. With 10% spare allowance, prepare 31 stones. You also need a removable rigid case, compatible adhesive, pickup tool, tray and ruler. This is a motif count, independent of the full-coverage calculator.
1. Print and check the heart
Download the heart outline. Print at 100% or actual size, without fit-to-page. The 10 mm bar must measure 10 mm. The dashed case shape is generic; position the heart on your actual empty case before applying anything.
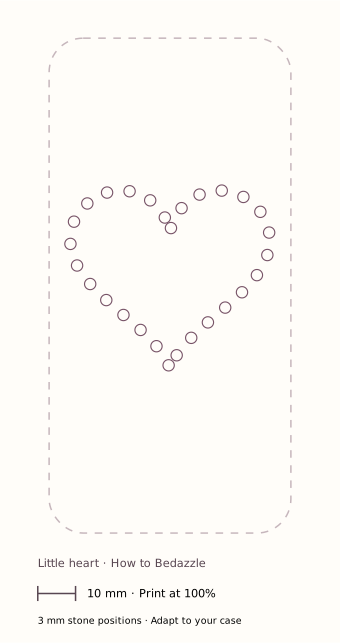
2. Find the center without marking the case
For a clear case, place the print underneath its back. For an opaque case, use the print as a nearby guide and measure the motif's position from both side edges. Keep permanent markers off the visible case surface.
3. Arrange the turning points first
Dry-fit the bottom point and the two rounded upper lobes, then fill the sides. Compare both halves from directly above. If the available space is smaller than the printed heart, choose a smaller motif rather than shrinking the print while retaining 3 mm stones.
4. Attach in short sections
Follow your adhesive's application instructions. Start at the lower point, complete one side, then match the other. Avoid laying down a large area of adhesive that could skin over before stones are placed.
5. Cure, inspect and use gently
Keep the empty case flat for the label's full cure time. Check every stone before reinserting the phone. Do not assume charging or protection performance is unchanged after decoration.
Make it yours
Try a single crystal color or alternate two shades. For alternating colors, prepare 14 stones of each shade plus separate spares. Adding a second outline requires a new dry layout and a fresh count; the download covers only one outline.